


Manage Users
Approve/Unapprove Users
The Approved menu shows whether the user account has been approved to be authenticated in the selected repository.
To modify the Approved status, follow either of the steps mentioned below:
-
- Using List of Users Screen
- Using Edit User Screen
- Using List of Users Screen
Note: Below steps allows you to Approve/UnApprove Multiple Users.
-
- Select a Repository > Users from the Left Navigation Panel. All the users will be displayed in the Grid in Right Panel.
- Select the user by clicking on the Check Box placed besides the Name of the User (A)
- You can also select user after filtering the list of users by using the filter option. Click here to know more about filter option.
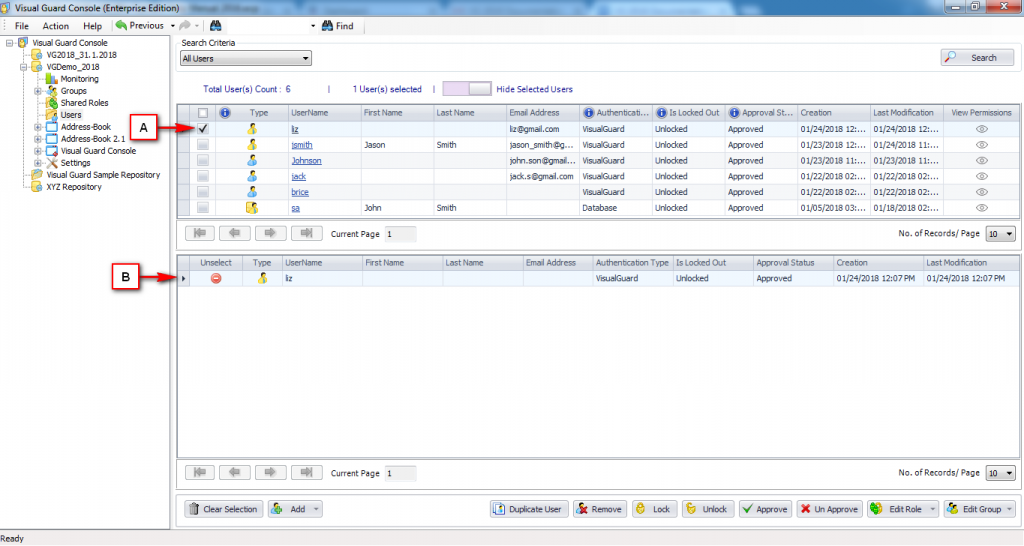
Note: You can select either single/multiple users by selecting multiple check boxes. Hence you can Approve/Un-Approve single/multiple users at a time.
-
- Grid (B) displays the list of selected users. This grid (B) will not be visible initially. For this you need to click on “Show Selected Users” option.
- The grid can be hidden by clicking on “Hide Selected Users” option. This option will be visible only if selected users grid is displayed on the page.
- Click on “V Approve” to Approve the user account OR click on to Un-Approve the user account.
- The “Approved” check box in “Edit User Details” screen will be selected or de-selected based on the action performed by the user.
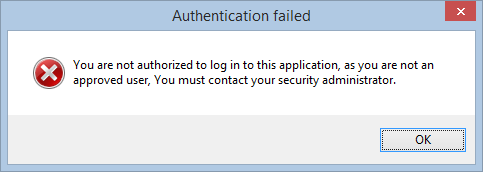
- If the user is un-approved, then the user will not be allowed to login. When the user tries to login an error message will be displayed as shown below
-
Using Edit User Screen
Note: Below steps allows you to Approve/UnApprove Single User.
-
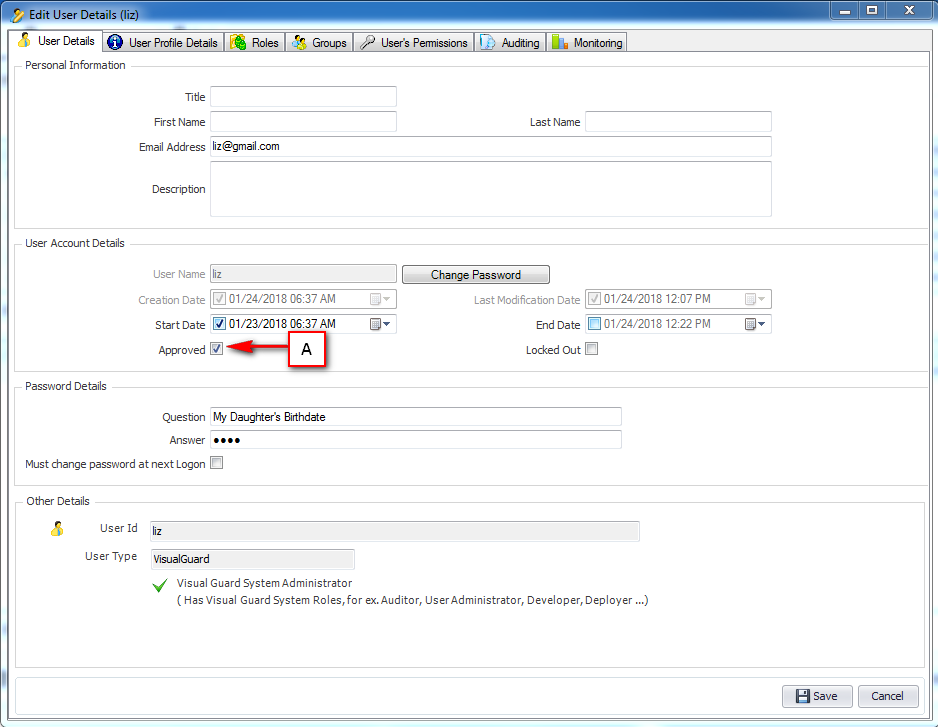
- Select a Repository > Users from the Left Navigation Panel. All the users will be displayed in the Grid in Right Panel.
- Click on the name of the user displayed in the Grid. “Edit User Details” Screen will open.
-
- Select the “Approved” check box to Approve the account of user OR De-Select the check box to un-approve the account of the user.
- Now, click on “Save” to save the details.
See Also: