Create a Visual Guard User
Visual Guard allows you to create new Visual Guard user accounts.
Note: You will be allowed to create the user accounts only if you have been assigned the privilege. Refer special roles section for more details on privilege
Follow the steps below to create a Visual Guard User:
- Login to the Repository under which user account(s) is to be created.
- Access the New Visual Guard User menu using one of the options below:
- Right click on the Repository Name provided on the Left Navigation Panel and select New Visual Guard User menu.
OR
-
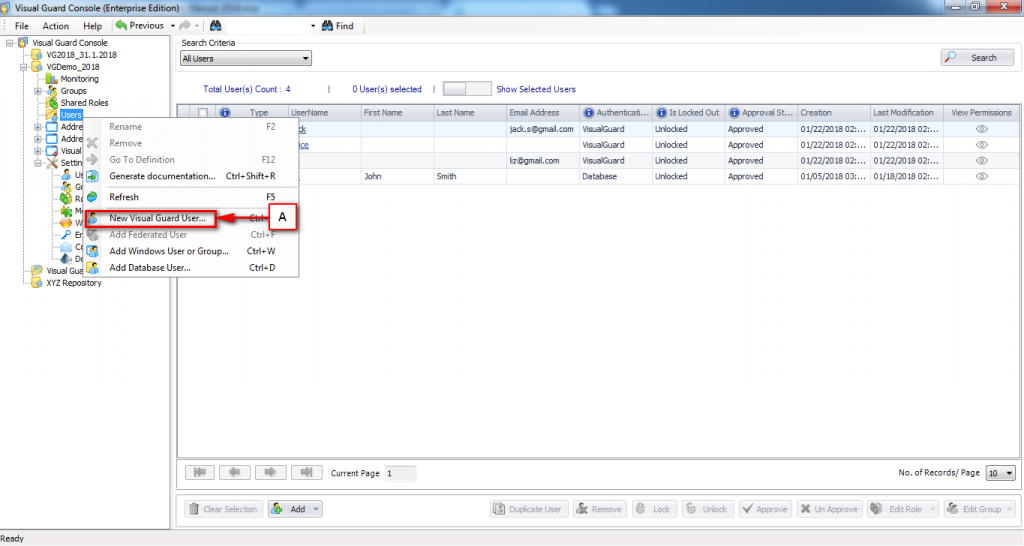
- Right click on the Repository >Users menu provided on the Left Navigation Panel and select New Visual Guard User menu (A).
OR
-
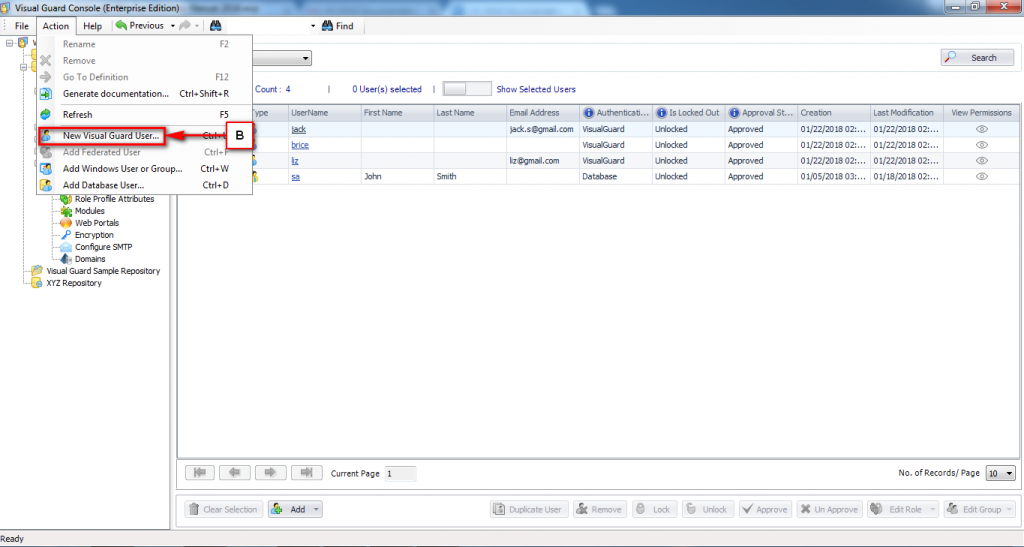
- Select the Repository from Left Navigation Panel and select the New Visual Guard User menu from Action Menu (B).
- The Create new user screen will be displayed as shown below:
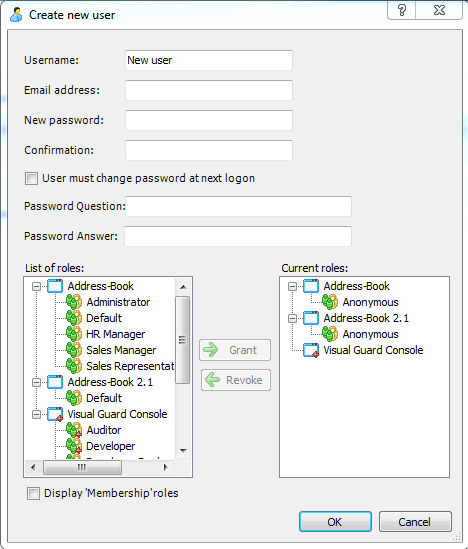
- To create new user account you have to provide following details:
| Field name | Description |
| Username | Enter a unique user name. This name will allow the user to login to the repository and access the application. |
| Email address | Enter Email address. The Email address will be mandatory if the repository is configured to require unique email address for each user. |
| New password | Enter the new password. The password will be displayed in encrypted form. |
| Confirmation | Reenter the password. The password specified here should match the password specified in “New password” field. |
| User must change password at next logon | Select this option if you want to allow user to change his password for his next logon. By default, this value is deselected. |
| Password Question | Enter the password question. This field will be mandatory if the repository is configured to require a password question and answer for each user. |
| Password Answer | Enter the password answer. This field will be mandatory if the repository is configured to require a password question and answer for each user. |
Role Assignment:
This section displays the list of available and assigned roles. You can grant or revoke the roles using this section.
| List of Roles | This section displays the list of available roles |
| Current Roles | This section displays the list of roles that have been already assigned to the new user. |
| Display ‘Membership’ roles | This option allows user to displays the membership access level to membership API for the application. The user can be assigned Unrestricted, Membership Members Only only or Add Members role only. |
- For example to create user Johnson specify details as displayed below:
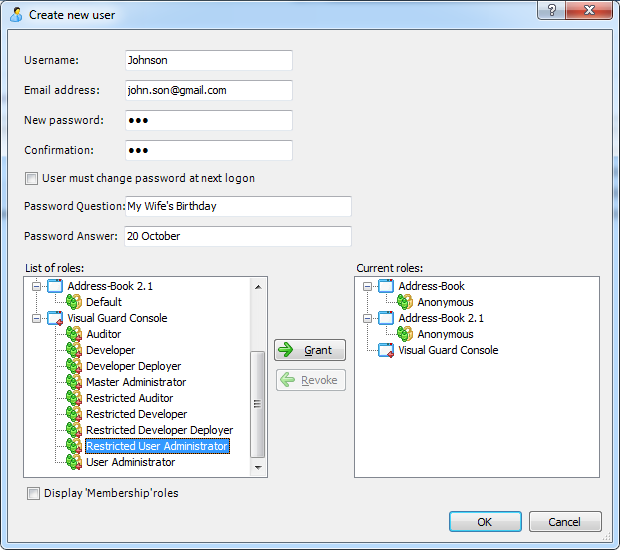
After specifying above details click “OK” to Save the user details.
Click “Cancel” if you do not want to create the user.
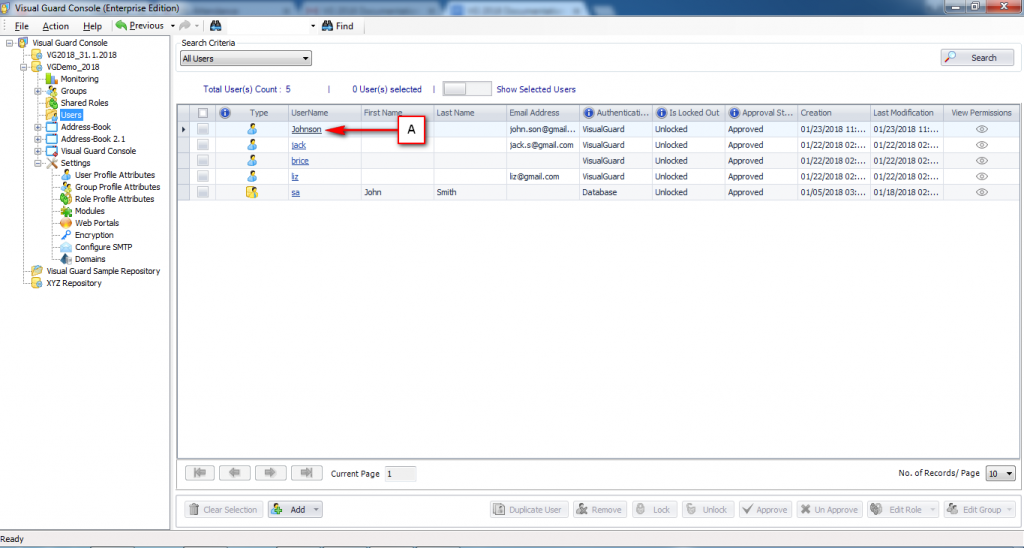
The new user account (A) will be displayed in the Grid on Right side.
See Also:


