Connect to a Repository
Once a repository has been created, it will be listed under VG WinConsole. Before you can perform actions on the repository, you need to connect to it.
Follow the steps below to access a repository on the console
- Access the VG WinConsole under the path Start > All Programs > Novalys > Visual Guard X.X > Visual Guard Console
- The Visual Guard console will open.
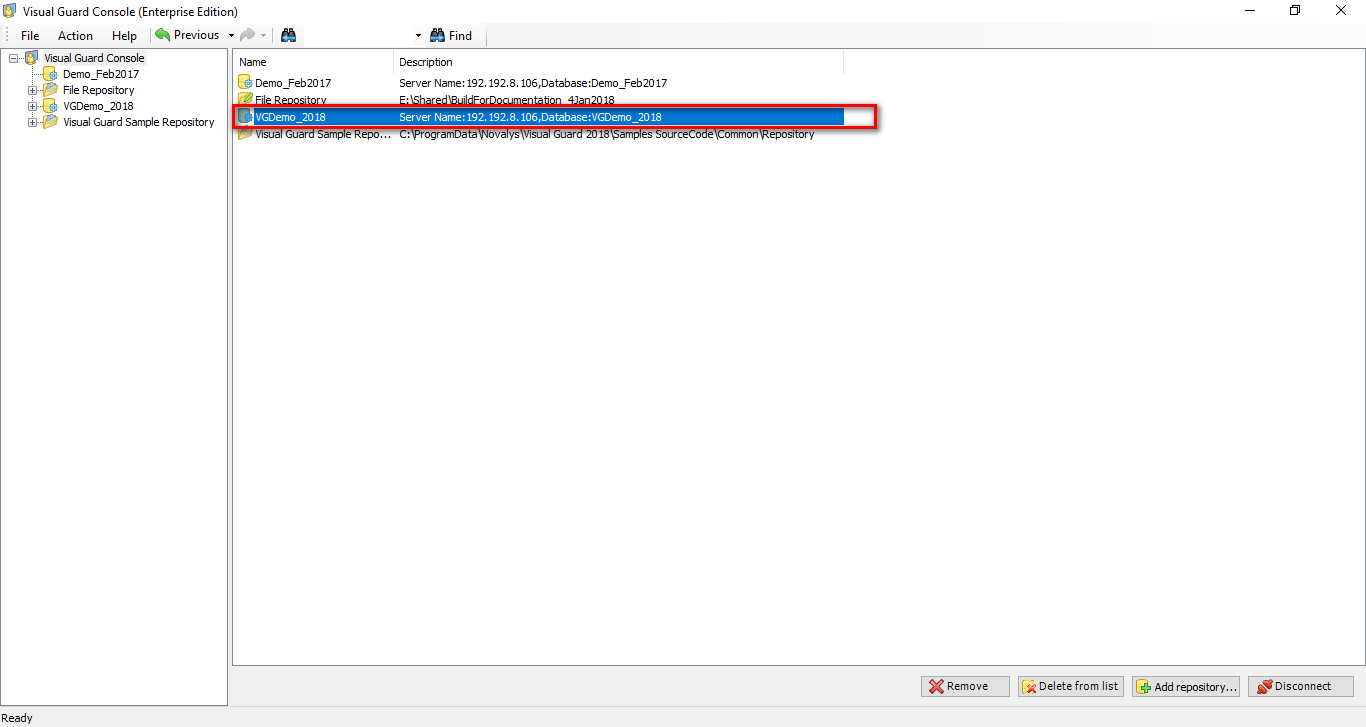
- Select the repository you want to connect to.
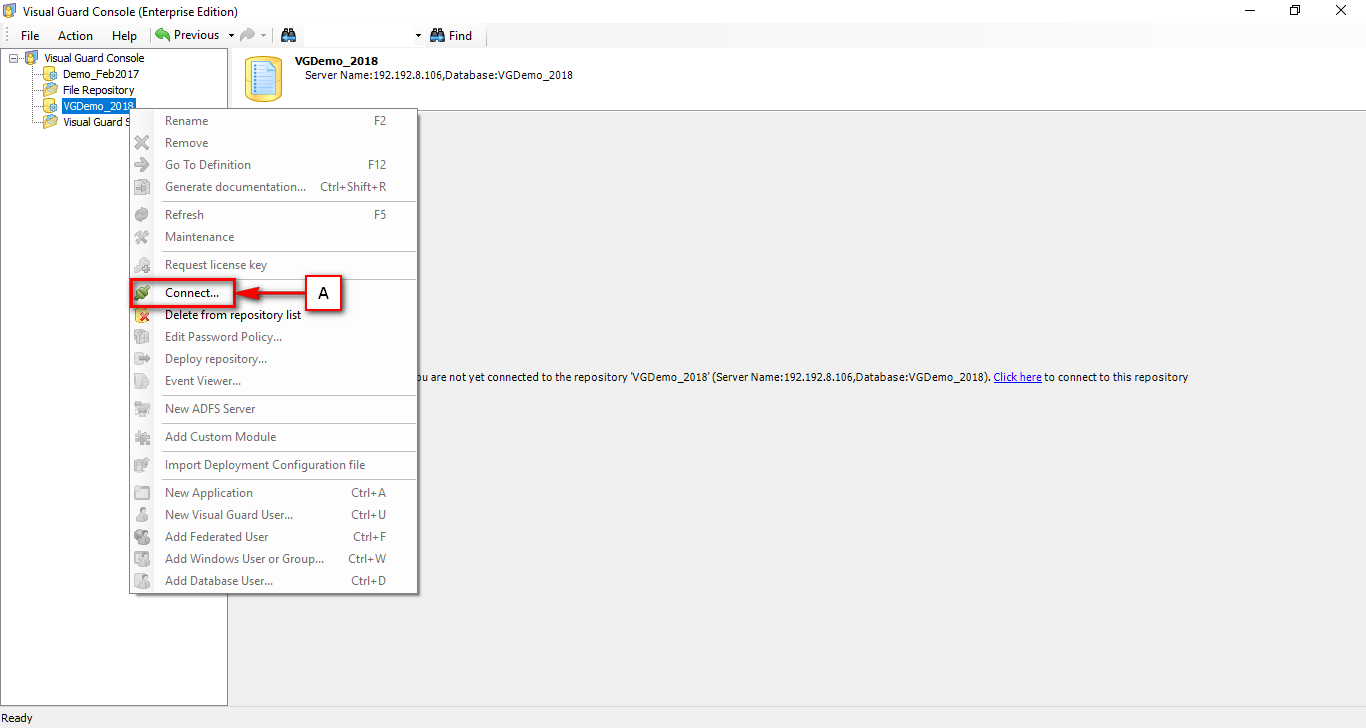
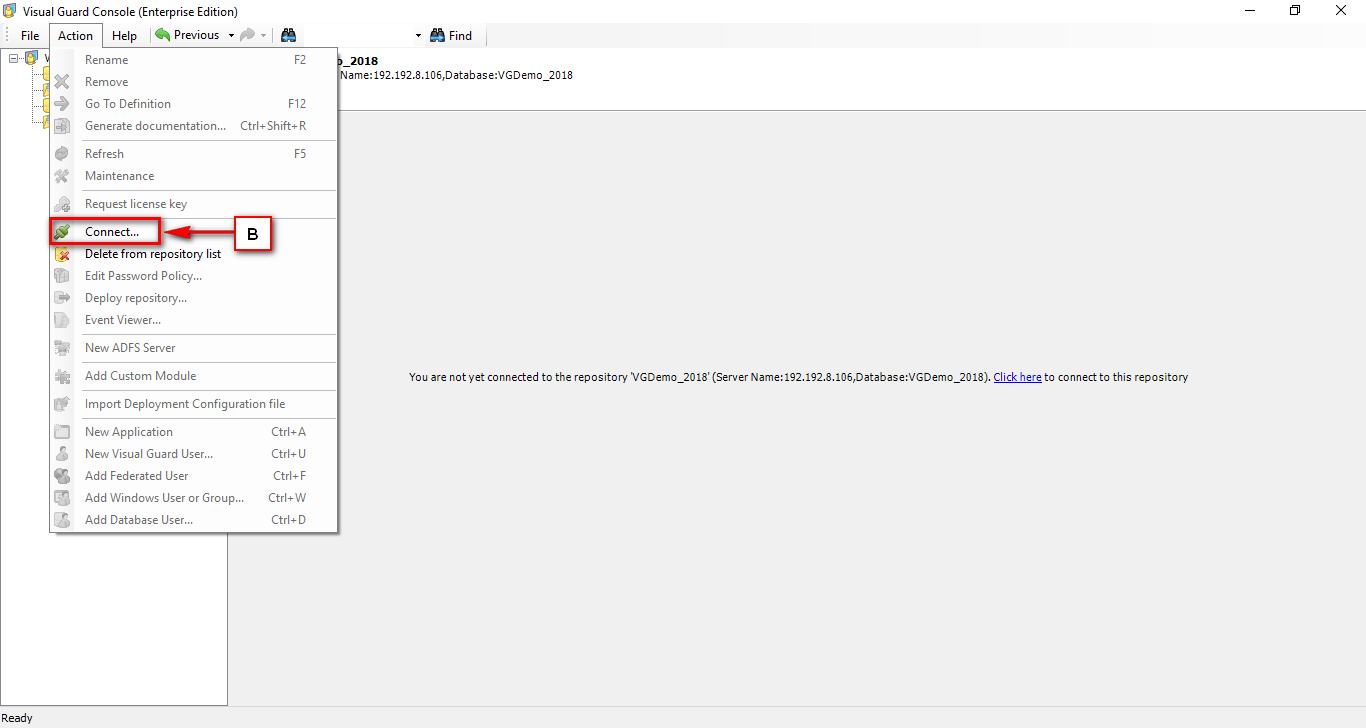
- Use one of the methods below to connect to the selected repository.
- Right click on the Repository in the Left Navigation Panel and select Connect menu from the Popup Menu. (A)
OR - Select Connect menu from Action Menu. (B)
OR - Click on Click Here (C) link provided in the Right Panel of Visual Guard Console
- Right click on the Repository in the Left Navigation Panel and select Connect menu from the Popup Menu. (A)
- Once you click on the connect option following screen will be displayed
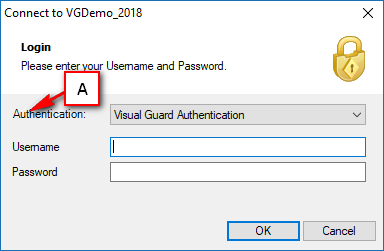
- If mixed mode authentication has been enabled in this repository, you will have to choose which mode you will use to connect.
- Select the appropriate authentication mode (A). Depending on the selection of the authentication type the fields will vary.
- Please Note: The user has to choose authentication mode only if mixed mode authentication is enabled.
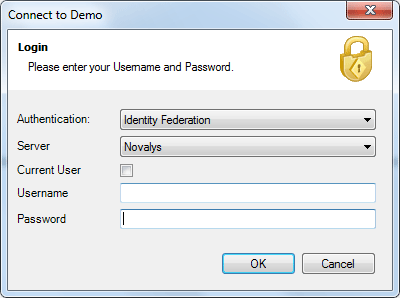
- E.g. In case the user selects Identity Federation Server the fieds displayed above will be shown.
- Select the ADFS server from the dropdown.
- Enter the username with domain name and password. In the present case if current user checkbox is selected, the currently logged in user credentials willl be selected. Click “OK” to log in the system.
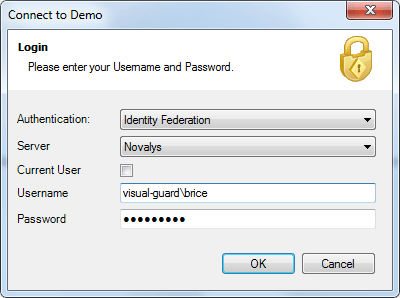
- The system will authenticate the credentials and provide you access according to the role assigned to you.
- If more than one role are assigned to you, the system will grant you the privileges relevant to all the roles.
- Click “OK” to login.
- The Repository details will be displayed to you.
See Also:


