Deploy & Import Repository
Repository deployment in Visual Guard refers to the process of deploying security configurations, such as roles, permissions, and user profiles, from a central repository to target environments. This deployment ensures consistency and synchronicity of security settings across different environments, such as development, testing, and production.
Visual Guard allows you to deploy the created repository. With this option you can make a copy of the whole repository to use it in the same system or the other system.
To deploy a repository, follow the steps below:
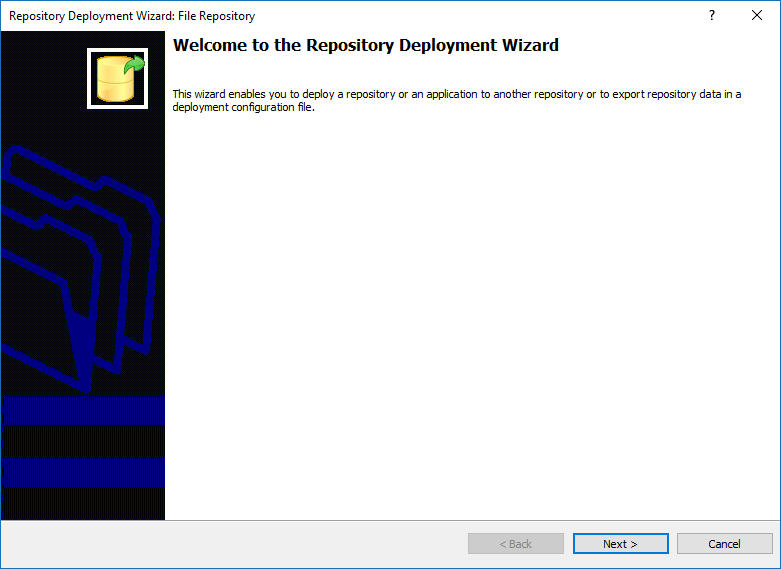
Step 1: Login to the Repository.
Step 2: Click “Next >” to continue the wizard or click “Cancel” to cancel the wizard.
Step 3: On clicking “Next >” the screen below will be displayed.Choose either A – Export data in a deployment configuration file or B – Deploy in an existing repository
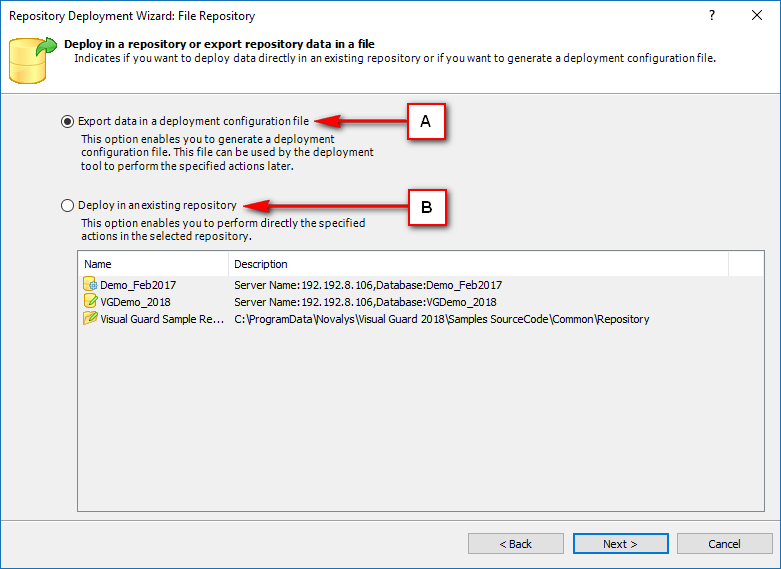
- If you choose A – Export data in a deployment configuration file follow the below steps. You get the below options
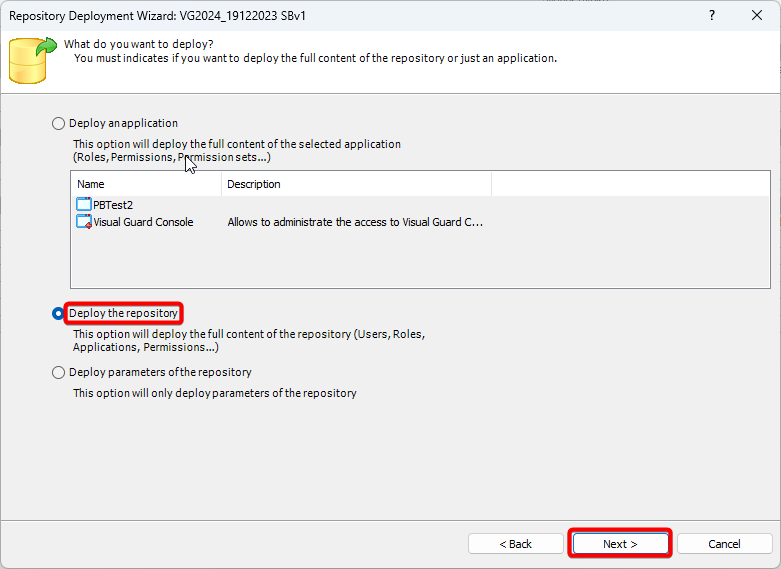
- Option 1: Deploy application: This option will deploy the full content of the selected application
- Option 2: Deploy the repository: This option will deploy yhr full content of the repository (users, roles, applications, permissions and much more)
- Option 3: Deploy parameters of the repository: This option will only deploy parameters of the repository
Option 2:
Step 1: Deploy the repository
Step 2: Choose your prefered overwrite option weather you want to overwrite the existing repository or not
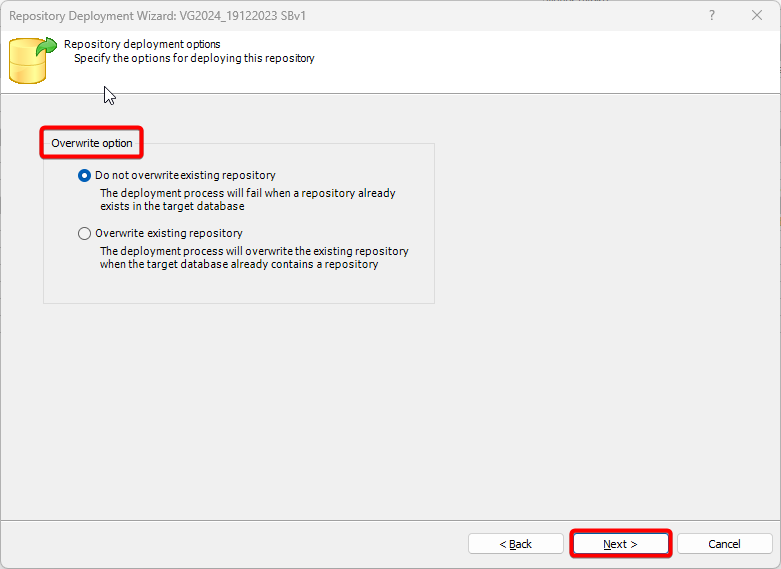
Step 3: Click on Finish to complete the deployment
Note: Once you click Finish you will get a notification to choose the path of where the file will be saved.

Option 3:
Step 1: Deploy parameters of the repository
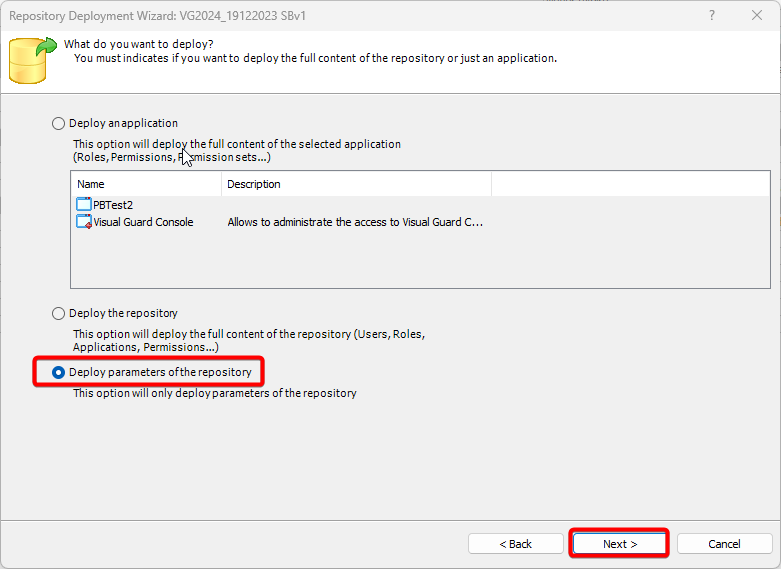
Step 2: Choose weather you want to deploy all respository information or Select informaion to deploy (you can select which parameter you would like to deploy manual from each category.
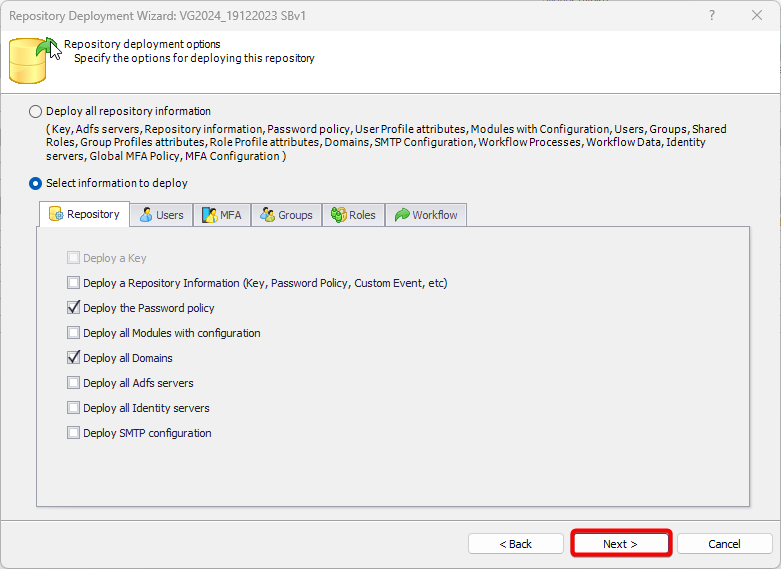
Step 3: Click on Finish to complete the deployment
Note: Once you click Finish you will get a notification to choose the path of where the file will be saved.
If you choose B – Deploy in an existing repository follow the below steps.
Step 1: Click deploy in an existing respository and click Next
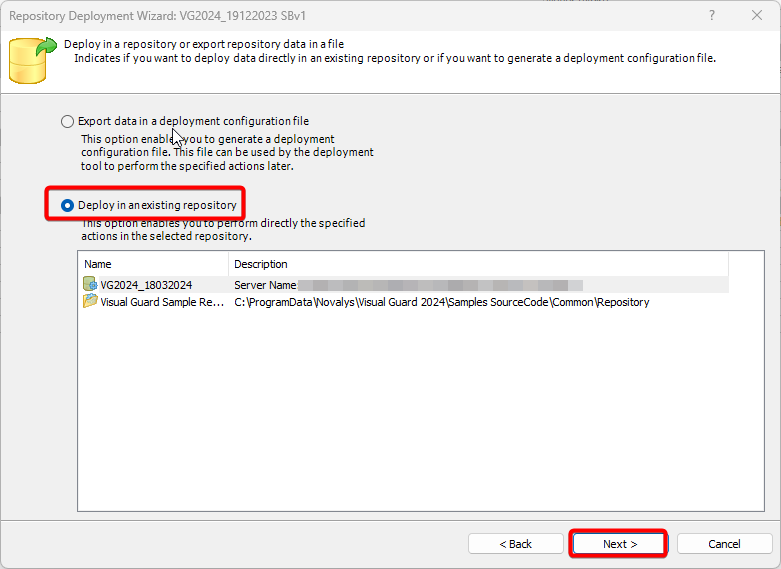
Step 2: Refer to the Option A steps further
Import Deployment Configuration Files
Importing deployment configuration files refers to the process of loading external files containing predefined settings and configurations related to the deployment of software or applications. These files typically include details such as environment-specific configurations, deployment targets, versioning information, and other parameters necessary for deploying the software effectively. Importing deployment configuration files streamlines the deployment process by providing a standardized way to configure deployment settings, ensuring consistency and accuracy across different environments and deployment scenarios.
To import the configuration files follow the below steps
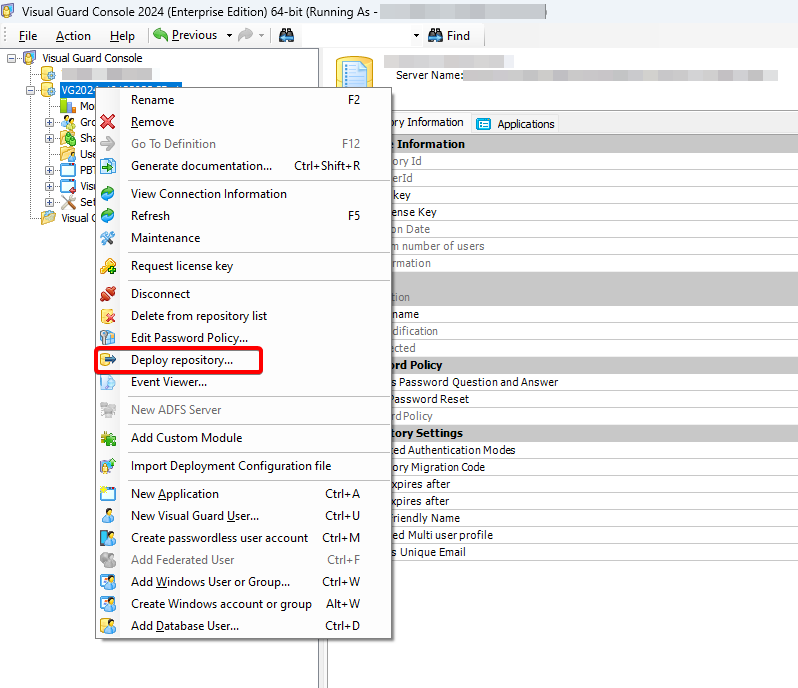
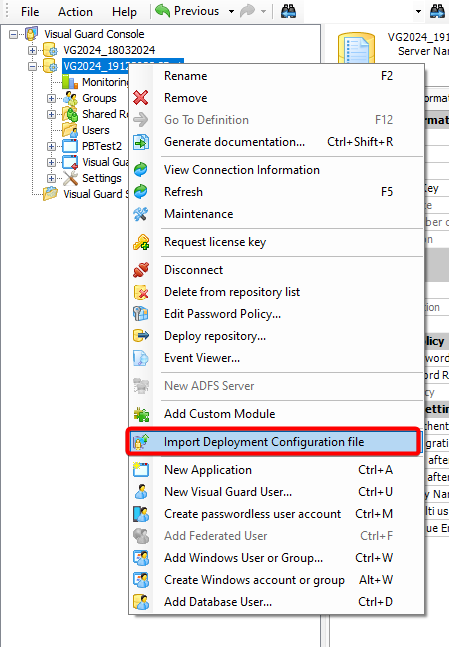
Step 1: Login to the repository and click on Import deployment configuration file
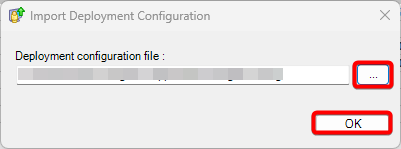
Step 2: Select the path of where your configuration files are saved by clicking on the 3 dots and click OK
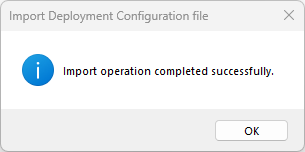
Step 3: Once the configuration is successfull you will receive a popup notifying the same