


Modules
Upgrading
After adding the new module in the system. Visual Guard 2017 allows you to Upgrade the version of custom module.
Note: This option will be available only for the Custom created modules.
Follow the steps below to create a new Module:
- Click on the new module in the Module section as highlighted in the below screen.
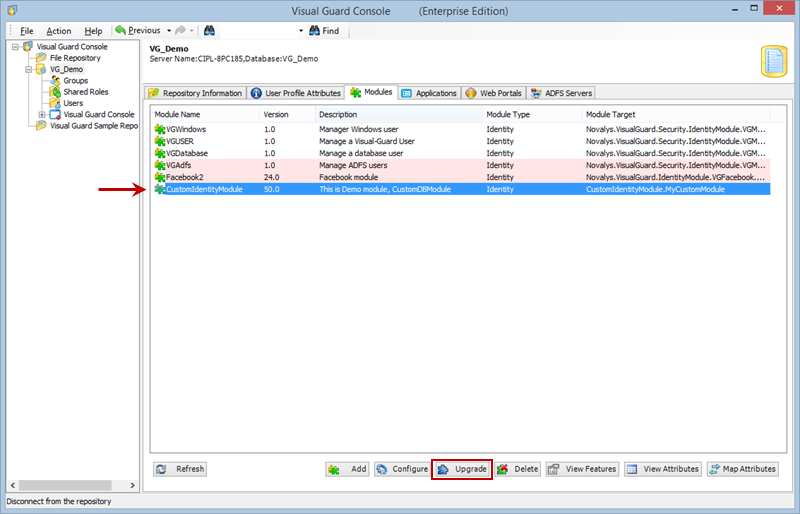
- Click “Upgrade Module” in the above screen, to change the version of your Custom module.
Note:
-
- You can only upgrade to a higher version of the module from the existing version of the module in the system.
- While upgrading your module by uploading the new dll file, make sure ModuleID and ModuleName does not change.
- Add Custom Module Popup will be displayed as shown below. You need to provide the path of the dll file here.
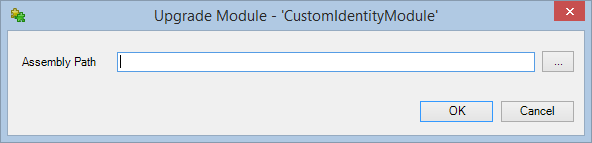
- You can directly paste the path of the dll file or browse the file by clicking on “…” button.
- Click “Cancel” to cancel upgrade of the module.
- After entering the assembly path click “OK” to add the dll file. You will be asked for confirmation if the attributes of the module are already been mapped.

- Click on to continue upgrade.
- The new upgraded module will be added to the list of Modules.
See Also: