


Add an Existing Repository
[Archive] Add an Existing Repository (File system)
Please Note: Deleting a repository from the list means it will not appear anymore in the Winconsole. This is different from the option “remove repository” which allows you to totally erase a repository from your system.
This section shows how to add in the preview a file repository, previously created and deleted from the list.
- Access the VG Win Console application using the path Start > All Programs > Novalys > Visual Guard > Visual Guard Console
- The VG Win Console will open.
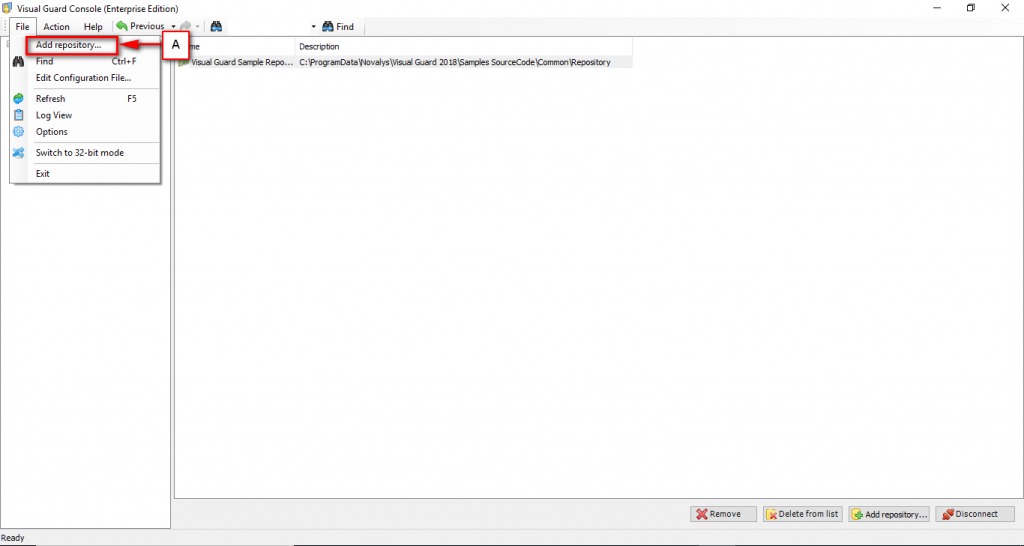
- Access the Add Repository option using one of the options below:
- Select Add repository option from File Menu (A)
OR
-
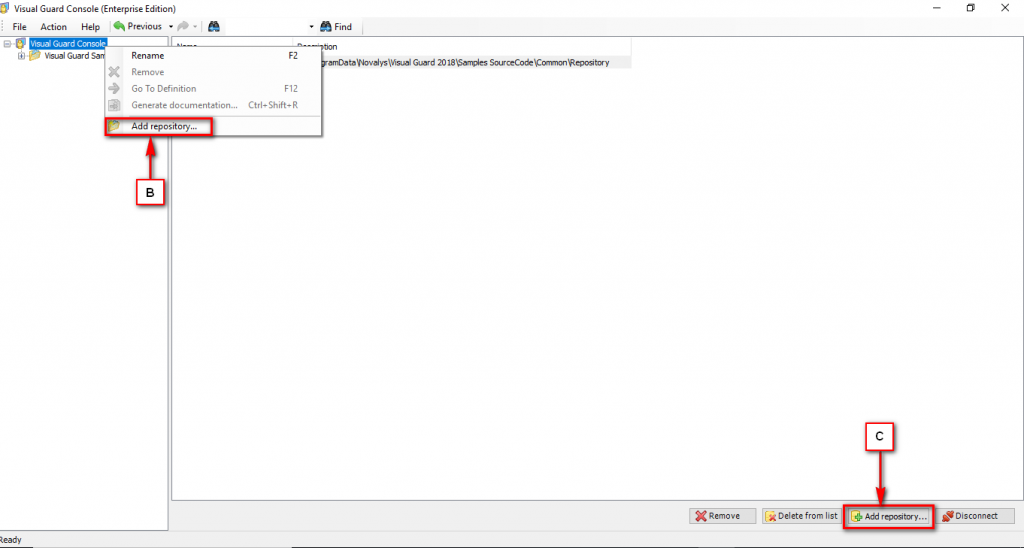
- Right click on the ‘Visual Guard Console’ in the Left Navigation Panel and select Add repository option from the Popup Menu. (B)
OR
-
- Click “Add repository…” (C)
- The Repository Creation Wizard screen will be displayed as shown below:
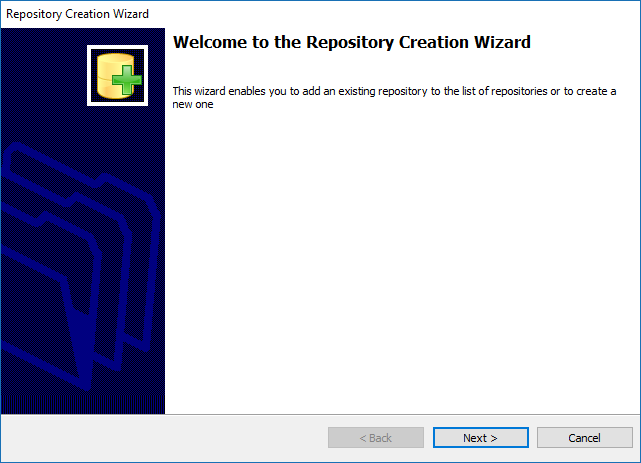
- The wizard will automatically walk you through the repository creation.
- Click “Next >” to access the Next screen.
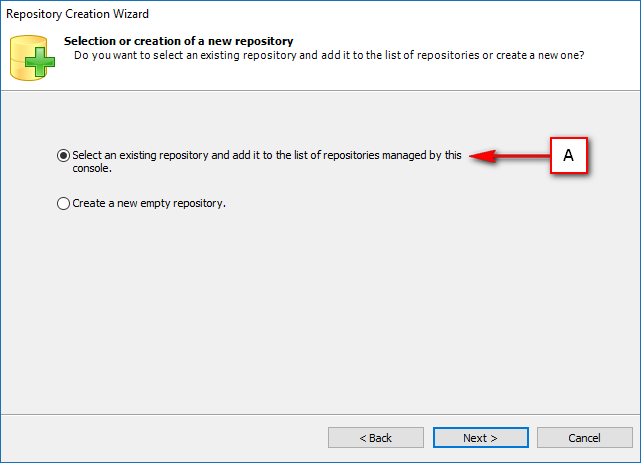
- Select the highlighted option (A) from the screen to create a repository using an existing repository.
- Click “Next >” to select a repository type.
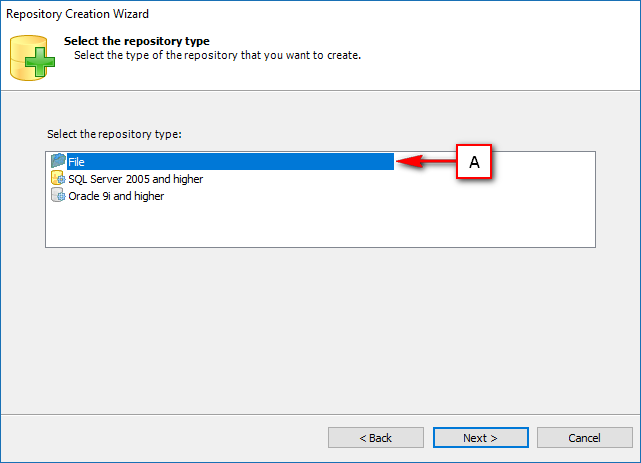
- Select option (A) from the screen to create a File Repository.
- Click “Next >” to select the path of the Repository under which the existing repository exists; the Repository Location Selection screen will be displayed.
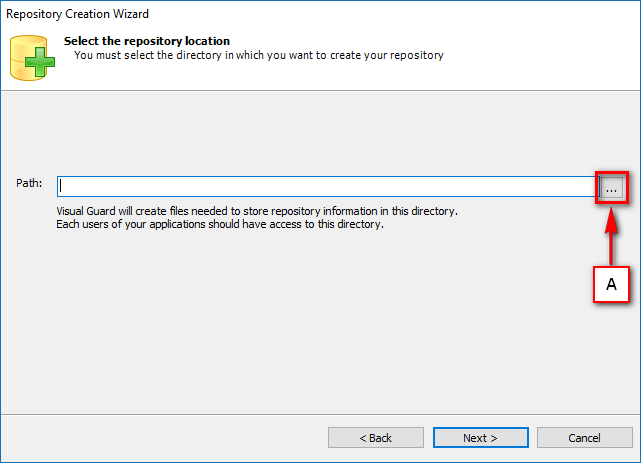
- Select the path where the repository is to be created by clicking “…” (A).
- This will be the location where the existing repository is stored.
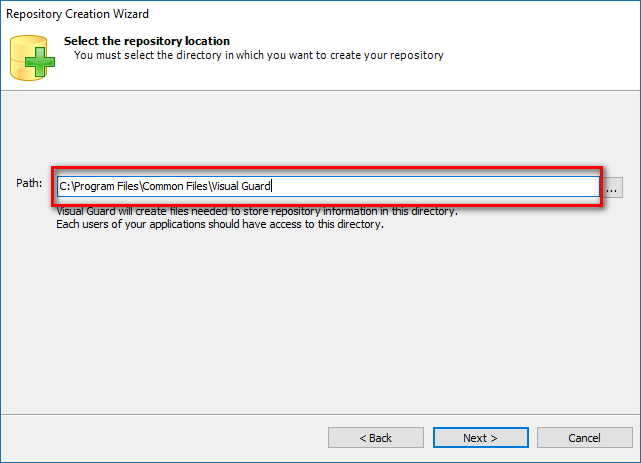
- The selected path will be displayed in the highlighted section as shown below.
- The Authentication Mode selected for the existing repository will automatically be used for the new repository.
- Click “Finish” to complete the Repository Creation Process.
- The Repository will be displayed in the Left Navigation Panel as well as the Main Section on the Visual Guard Console.
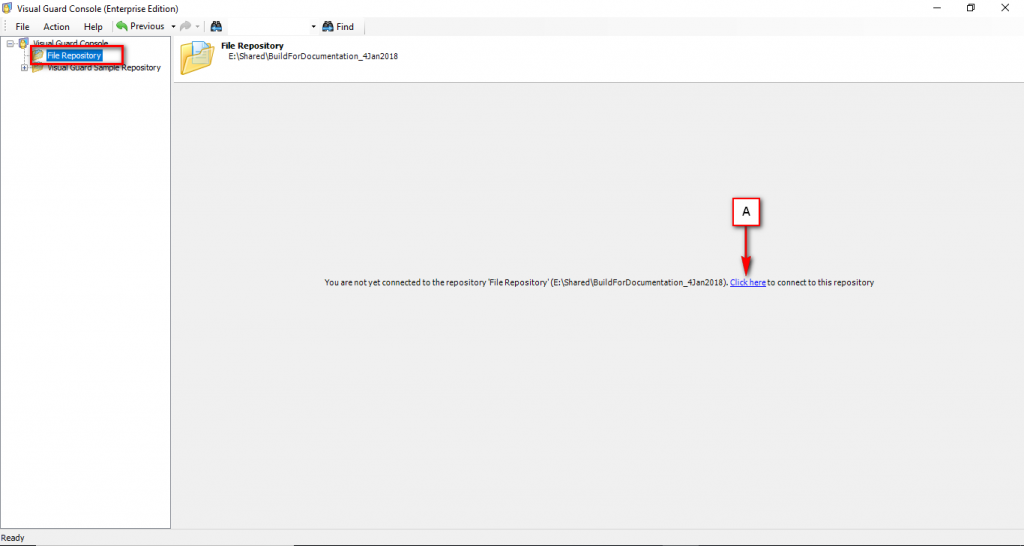
- To access the repository, click on the option (A).
- The following screen will open and allow you to authenticate and access the repository.
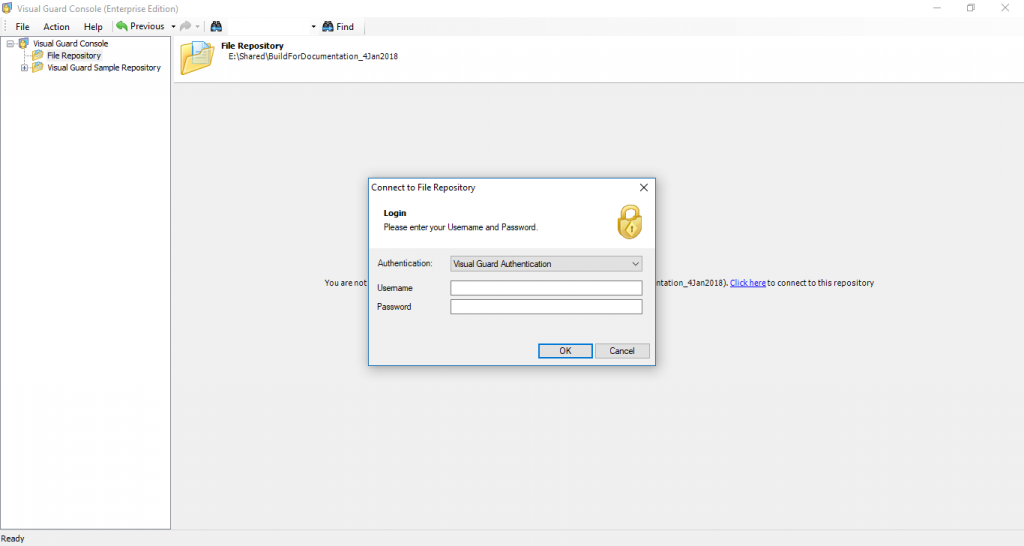
- Select the Authentication Mode and specify the username and the password.
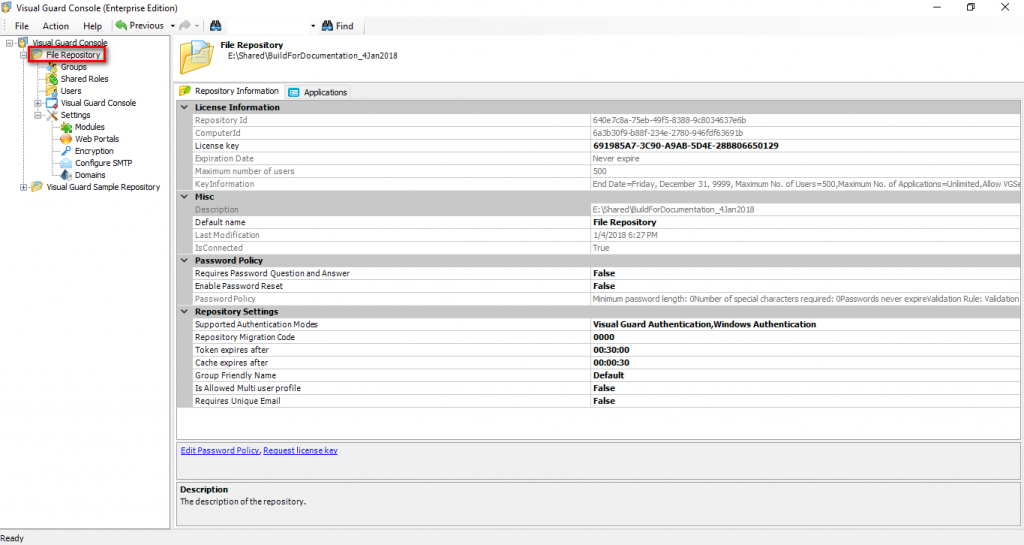
- The following repository related details will be displayed in the main area.
See Also: